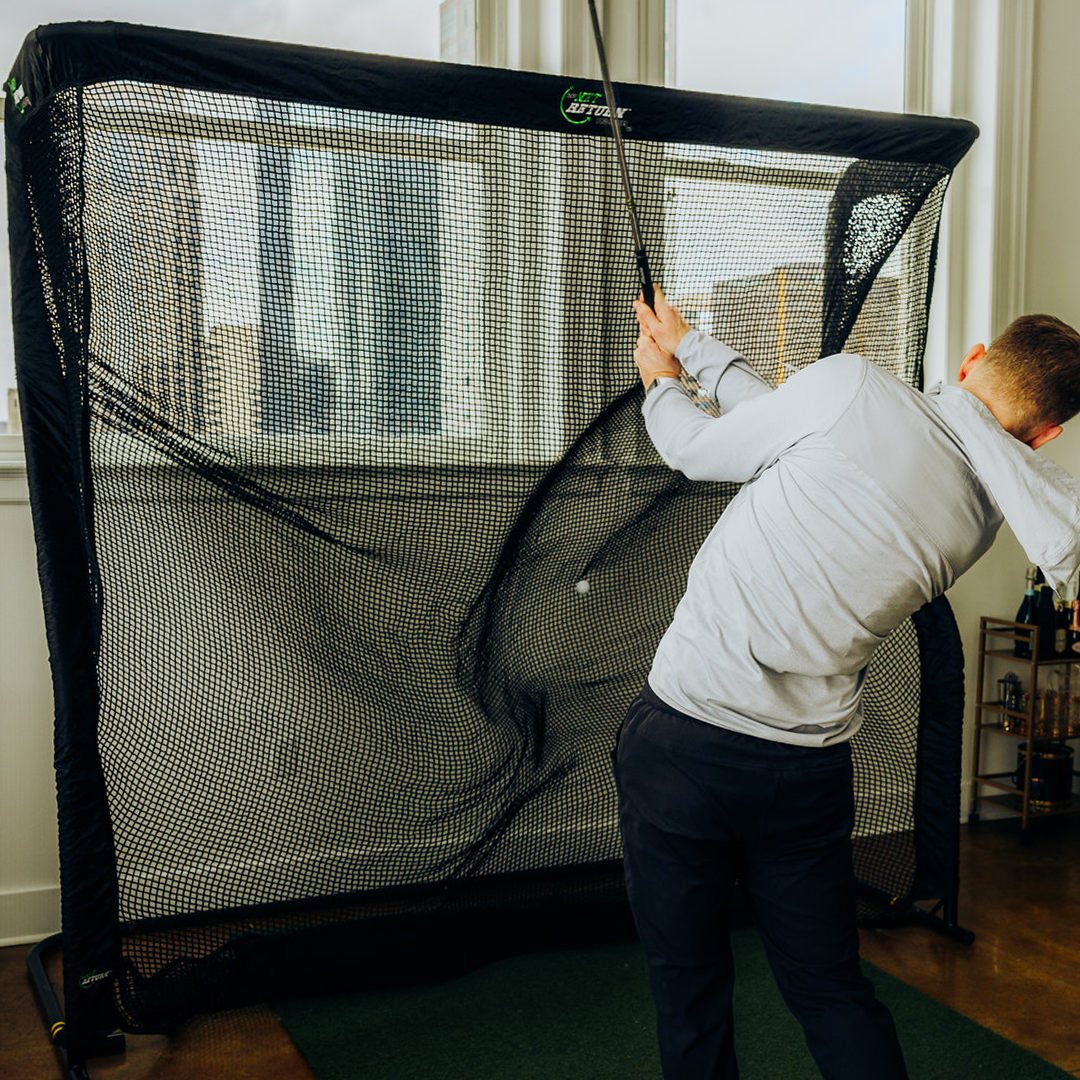

If you’re looking at a Net Return, you’re not just buying a golf net.
You’re trying to build a practice space inside - your garage, your spare room, your basement, maybe even your kids’ playroom - and you’re trying to do it without clipping the ceiling with your driver, smashing a wall, or stressing everyone out at home.
And that’s where it gets confusing.
You see the frame sizes.
You see the room dimensions.
You see names like Junior, Mini, Home, Pro, Pro 8, Pro 9, Pro 10, Pro XL.
But what you really want to know is simple:
Will this actually fit in my space, and will I be able to swing safely and comfortably?
This guide is written exactly for that moment.
I’m going to walk you through:
-
How the different Net Return models are sized
-
The minimum room dimensions you realistically need
-
How to measure your own space the right way
-
Ceiling height, safety, and side clearance
-
Real-world scenarios: apartment, garage, sim room, kids’ room, backyard
-
A clear, step-by-step setup checklist you can follow
Think of this as your Net Return setup guide and room dimensions sanity check in one place. By the end, you’ll know whether your space works, which model makes sense, and how to set it up so you actually enjoy hitting indoors.
Why Planning Your Net Return Space Matters
Most people do this backwards.
They fall in love with the idea of practicing at home, they order a net, the box arrives, and then reality hits when they try the first driver swing and feel the ceiling brush their shaft or see the ball flirting with a side wall.
Planning your Net Return room dimensions first saves you from:
-
That sick feeling of “this doesn’t fit” after unboxing
-
Living with a setup that always feels a bit scary or cramped
-
Wasting money on a model that’s too big (or too small) for your space
-
Constant fights with cars, furniture, doors, or kids’ toys around the net
And it’s not just about whether the frame fits on paper.
It’s about:
-
Whether you can make a full, confident swing
-
Whether the ball has enough room to fly, hit the net, and return safely
-
Whether people, pets, and breakable things are protected
-
Whether the setup feels good enough that you’ll actually use it regularly
So before you think “Pro or Home?”, “Junior or Mini?”, the real starting point is:
“What does my room look like, and what can it realistically support?”
Once you answer that, the rest of the choices become much easier.
Understanding Net Return Models And Dimensions
Before you dive into measuring, it helps to know what you’re actually working with.
Net Return has two main families:
-
Home Series - compact, space-friendly frames
-
Pro Series - larger, more expansive frames for bigger bays and sim rooms
Within those, there are eight main models you’ll see over and over again:
Home Series
-
Junior - very compact, designed for kids and ultra-tight spaces
-
Mini - small footprint for apartments and smaller rooms
-
Home - the standard home golfer frame for garages and backyards
Pro Series
-
Pro - the starting point of the Pro family
-
Pro 8 - square 8' × 8' face, very sim-friendly
-
Pro 9 - extra width for more lateral dispersion
-
Pro 10 - very wide 10' frame for big bays
-
Pro XL - the largest, tallest net for true dedicated rooms
All of them share the same core ideas:
-
A strong frame and shaped net that returns the ball back to you
-
The ability to handle real golf balls at real swing speeds
-
Indoor or outdoor use
-
Fast assembly with a color-coded, push-button frame system
The difference is not “good vs bad” or “cheap vs premium” - it’s how much physical space they occupy and how much “comfort margin” they give your swing.
To make that easier to see, let’s look at all eight in one table.
Minimum Room Dimensions For Each Net Return Model
You have two layers of numbers to care about:
-
Net dimensions - how big the frame itself is
-
Minimum room dimensions - the space you need to swing and let the ball travel safely
Let’s put both in front of you, side by side.
Net Size And Typical Use
First, here’s a quick view of each model, its size, and what it’s usually used for:
|
Model |
Series |
Net Width |
Net Height |
Net Depth |
Typical Use Case |
|
Junior |
Home |
4'6" |
4'6" |
2'4" |
Young golfers, very tight rooms, kids’ playrooms, low ceilings |
|
Mini |
Home |
5' |
6' |
3'6" |
Apartments, small spare rooms, compact garages |
|
Home |
Home |
7' |
7' |
3'6" |
Typical garage, basement, or backyard, all-round family practice |
|
Pro |
Pro |
8' |
7'6" |
3'6" |
Serious home golfer in a standard garage or garden |
|
Pro 8 |
Pro |
8' |
8' |
3'6" |
Square 8 × 8 hitting window, great for simulator enclosures |
|
Pro 9 |
Pro |
9' |
8' |
3'6" |
Wider comfort for bigger swings and two-player or coaching setups |
|
Pro 10 |
Pro |
10' |
8' |
3'6" |
Very wide bays, coaching spaces, group practice |
|
Pro XL |
Pro |
10' |
9'6" |
3'6" |
Dedicated sim rooms, studios, and premium setups needing maximum height/coverage |
Now, the more important table for you as a home golfer:
Net Size Vs Minimum Room Dimensions
These are ballpark room dimensions that work for most golfers. They’re built around:
-
Enough width for the frame plus a bit of side buffer
-
Enough height that the top of the net can stand properly and you can swing freely without hitting the ceiling
-
Enough length that the ball can fly, hit the net, and roll back safely
Tip: Even if your room is slightly different, this table gives you a very solid starting point.
|
Model |
Net Size (W × H × D) |
Suggested Minimum Room Width |
Suggested Minimum Room Height |
Suggested Minimum Room Length |
|
Junior |
4'6" × 4'6" × 2'4" |
~6'6" |
~5'6"-6' |
~14' |
|
Mini |
5' × 6' × 3'6" |
~7' |
~7'-7'6" |
~14' |
|
Home |
7' × 7' × 3'6" |
~9' |
~8' |
~14' |
|
Pro |
8' × 7'6" × 3'6" |
~10' |
~8'6" |
~14' |
|
Pro 8 |
8' × 8' × 3'6" |
~10' |
~9'-9'6" |
~14' |
|
Pro 9 |
9' × 8' × 3'6" |
~10'-11' |
~9'-10' |
~14' |
|
Pro 10 |
10' × 8' × 3'6" |
~12' |
~9' |
~14' |
|
Pro XL |
10' × 9'6" × 3'6" |
~12' |
~10'-10'6" |
~14' |
A few things to keep in mind when you read this:
-
Width is usually the first thing that kills a plan.
A 10' wide Pro 10 or Pro XL looks amazing in photos, but you really need 11-12' of room width before it feels right in real life. -
Length (front to back) is often underestimated.
By the time you allow for the net, a little gap behind, and your stance area, that 14' length guideline is actually very reasonable, especially if you ever plan to run a launch monitor or simulator. -
Height has two layers:
-
The net itself needs clearance to stand.
-
Your driver swing needs even more clearance than the frame.
We’ll handle the ceiling height question properly a bit later, but for now, this table gives you a very solid check: if your room size is below these numbers in two or more directions, you may need to go down a size.
How To Measure Your Room For A Net Return
Now let’s get practical.
You don’t need any fancy tools. Just a tape measure, maybe some painter’s tape, and a little patience.
Step 1 - Choose Your Wall Or Hitting Line
Decide where the net is going to live in your room:
-
Against a solid wall
-
In front of a garage door
-
Freestanding in a basement
-
At the back of a backyard patio
If you’re indoors, pick a wall that doesn’t have fragile things (glass, artwork, TVs) in the immediate impact zone. If there are, mentally add the cost of side protection into your plan.
Step 2 - Measure Room Length (Front To Back)
Stand with your back to the wall where the net will sit and measure straight out:
-
From the wall to where the front legs of the net would be
-
From the front of the net to where you’ll place the ball
-
From the ball to the nearest obstacle behind you (door, car, furniture, opposite wall)
You generally want around 14 feet total length to feel comfortable:
-
Roughly 1-2 ft behind the net so the frame isn’t jammed into the wall
-
Around 5-10 ft from ball to net (especially if you’ll ever use a launch monitor)
-
Around 2-4 ft behind you so your backswing doesn’t feel cramped
If you only have, say, 10-11 ft total, you might still hit wedges and short irons comfortably, but the driver will start to feel compromised.
Step 3 - Measure Room Width
Now measure the wall from left to right where the net will sit.
Think about:
-
The net width (see the table above)
-
A little room for side barriers, if you plan to add them
-
If you’re left-handed, right-handed, or sharing the setup with someone of the opposite handedness
As a rule:
-
For Junior or Mini, 7-8 ft width is usually enough.
-
For Home, 9 ft width is the real minimum where it feels good.
-
For Pro, Pro 8, Pro 9, 10 ft width is the sensible starting point.
-
For Pro 10 or Pro XL, you’ll be much happier with 11–12 ft.
Step 4 - Measure Ceiling Height
This one you do where you will stand.
-
Stand on the spot where your hitting mat will go.
-
Hold your driver and make a smooth, normal backswing and follow-through.
-
Have someone watch (or film you) and see how close the club comes to the ceiling, lights, beams, or fans.
Your ceiling should ideally give you:
-
Enough clearance that the club never feels like it’s flirting with the ceiling
-
A comfort buffer of at least 6-9 inches between the highest point of your swing and the lowest ceiling obstruction
If your ceiling is low, you might still hit shorter clubs indoors and save drivers for the range - but it’s better to know that before you buy.
Step 5 - Mark The Footprint
This is a small trick that makes a big difference.
Use painter’s tape or masking tape on the floor to mark:
-
The approximate front legs of the net
-
The edges of the turf or hitting mat
-
The spot where the ball will sit
-
Your stance area
Once you see the footprint taped out, you’ll immediately feel whether the room works:
-
Does the net block a door or cupboard?
-
Can people still walk around the room?
-
Does your stance feel central and comfortable, or jammed into a corner?
If it feels wrong at the tape stage, it will feel worse once the net is actually there.
Ceiling Height: Can You Swing Driver Comfortably?
Frame height is one thing. Your driver arc is another.
Most indoor golfers eventually bump into this reality:
-
The net fits in the room
-
But their driver swing doesn’t feel safe or comfortable
So let’s separate the two.
Net Height Vs Swing Height
From the table earlier:
-
Junior and Mini nets can stand in relatively low rooms
-
Home nets are 7' tall
-
Pro and Pro 8/9/10 are 7'6"-8' tall
-
Pro XL is around 9'6" tall
If your ceiling is only 8 ft high, you might be able to physically fit a 7' or even 7'6" frame, but your driver swing might still feel risky if you’re tall or have a very upright move.
A simple way to think about it:
-
Under 8 ft ceilings - Often fine for juniors, wedges, and shorter irons, but driver is questionable for taller golfers.
-
8-9 ft ceilings - You can usually hit irons and hybrids; many golfers around average height can squeeze in a driver, but tall players need to test carefully.
-
9-10 ft ceilings - This is the comfort zone for most full driver swings.
A Simple Ceiling Height Table
Here’s a rough guidance table. This is not a strict rule, just a way to sanity-check your own situation:
|
Golfer Height |
Comfortable Ceiling For Irons Only |
Comfortable Ceiling For Driver |
|
Up To 5'6" |
8' |
8'6"-9' |
|
5'7" To 6'0" |
8'-8'6" |
9' |
|
Over 6'0" |
8'6" |
9'-10' |
If your numbers are slightly lower than this, you may still swing the driver by adjusting your stance or shortening your backswing, but you’ll probably never feel totally relaxed - and that matters if you want to practice often.
When in doubt, give yourself more height rather than less. You want your Net Return setup to be something you look forward to using, not a constant “am I going to hit the ceiling?” worry.
Safety And Clearance Essentials For Indoor Setups
Once you know your room works on paper, the next job is to make sure it’s safe in practice.
A Net Return is designed to catch and return the ball, but the space around it still matters a lot, especially indoors.
Why Side Protection Is Such A Big Deal
Even if you’re a solid ball-striker, mishits happen.
-
A heel-y pull that starts left
-
A toe strike that shoots out right
-
A chunked wedge that pops up strangely
Indoors, those misses have nowhere to go except:
-
Side walls
-
Furniture
-
Windows
-
People or pets
That’s why side protection is almost a must-have for most indoor setups.
If you’re in a tighter room, adding side barrier nets that flare out from the sides of the frame does two things:
-
It catches balls that would have just missed the net face.
-
It gives you a huge psychological comfort boost, which makes your swing more relaxed.
Think of side barriers as part of your Net Return setup guide baseline, not a luxury extra, if you’re indoors.
Overhead Protection And No Fly Zones
If you or anyone using the net likes to hit:
-
High wedges
-
Lofted chips
-
Soft flops
Then you need to think about what happens above the frame.
In some rooms, especially where the net is backed by a wall, there’s a real chance a very high lob could just clear the top of the net and hit:
-
The wall
-
A window
-
A ceiling beam or light
Overhead extensions or “no fly” style netting can help catch those outliers by extending a canopy forward from the top of the frame. Even if you don’t use them from day one, at least understand whether your room layout would benefit from that extra layer of safety.
Clearance Around The Golfer
When you picture safety, don’t just think about where the ball is going - think about where you are moving.
Check that, around your stance:
-
There are no sharp corners or objects near your hands at the top of your backswing
-
There are no low lights or fans above your club path
-
There’s no chance of hitting a back wall or pillar with your club on follow-through
A good mental rule is to imagine a swing bubble of roughly 7 ft around you - you want that bubble to be mostly clear, especially in the direction your club travels.
People, Pets, And Breakables
The last layer of safety is about everything that moves (and everything that breaks):
-
Keep kids and pets behind your hitting line, not beside it
-
Avoid setting up the net with a doorway directly in your swing zone
-
Take a ruthless view of fragile objects on the side walls - if you would be upset to see it smashed, move it out of the impact corridor
A safe setup is one you can use confidently when you’re home alone, tired after work, or half-focused. If your setup only feels safe under perfect discipline, it’s not really safe enough.
Step-By-Step Setup Checklist For Net Return Nets
Once your room is measured and your model is chosen, the actual physical setup is the fun part.
Use this checklist as your Net Return setup guide for any of the eight models.
Before You Assemble Anything
-
Re-check your room length, width, and height against the spec table
-
Decide where the front of the net will sit
-
Decide whether you’re installing:
-
Side barriers
-
Overhead protection / “no fly” netting
-
Mark the footprint of:
-
Net legs
-
Turf / hitting mat
-
Ball position
-
Stance area
Frame Assembly
Net Return frames are usually built around a color-coded, push-button system that slots together without tools.
-
Lay all frame pieces on the floor and match colors or labels
-
Start with the base - build the bottom rectangle or “U” shape first
-
Add the uprights on each side
-
Finish with the top bar across the front
As you click pieces in, make sure each push-button is fully engaged so the frame is locked and stable.
Attaching The Net
Most Net Return nets slide over the frame like a sleeve:
-
Find the top of the net (often where the logo or target is)
-
Slide it over the top bar and then down the sides
-
Pull the net down over the frame so it creates a deep pocket that can absorb shots and roll the ball back
Check that:
-
The “sweet spot” or target area is roughly centre of your hitting line
-
The depth of the net is not over-stretched; you want some slack so the ball can be absorbed, not bounced
Adding Side Barriers And Overhead Netting
If you’re using side barriers:
-
Attach them to the sides of the frame according to the instructions
-
Let them flare out so they create a funnel that guides any wild ball back towards the centre
-
Use sandbags or weights at the ends of the barriers to keep them in place
If you’re using overhead no fly netting:
-
Attach the front edge to the top of the frame
-
Let it drape slightly forward and down
-
Make sure it overlaps enough that high shots will be guided back into the main net
Final Safety And Comfort Check
Before you take your first full swing:
-
Hit a few short chips or half wedges and watch how the ball behaves
-
Walk around the frame:
-
Is anything wobbling?
-
Are there any metal parts too close to where the ball might hit?
-
Stand in your stance position and:
-
Make a slow-motion full swing
-
Check ceiling, walls, and objects around you
If everything feels solid, then you can start increasing club speed gradually.
Choosing The Right Net Return Model For Your Space
Now that you understand room dimensions, ceiling height, and safety, choosing the actual model becomes much more straightforward.
If Your Room Is Very Small (Bedroom Or Tiny Office)
If your room is closer to:
-
Width: 6-8 ft
-
Height: 7-8 ft
-
Length: 10-12 ft
Then you’re very much in Junior or Mini territory.
-
Junior if it’s mainly for a child or you can only spare the tiniest corner
-
Mini if you want a compact net but still want it to feel like a proper practice station
You’ll probably use:
-
Shorter irons and wedges
-
Maybe foam balls if the space is shared or very tight
If You Have A Standard Single-Car Garage Or Basement
This is where the Home net shines, and in some cases where the Pro net begins to make sense.
Typical single-car garage:
-
Length: 18-20 ft
-
Width: 10-12 ft
-
Height: 8-9 ft
In a space like that:
-
Home (7' × 7') fits comfortably against the front wall or garage door
-
You can leave enough room behind the ball, and still move around the car when the net is not in use
-
If your width and height are on the higher end, Pro may also be possible, giving you a bit more lateral comfort
If You Want A Simulator Or Share The Space With Serious Golfers
Once you start thinking:
-
Launch monitors
-
Projector and impact screen
-
Multiple regular users
-
Long-term, permanent bay
You’re usually in Pro Series territory:
-
Pro if your width is around 10' and you want a strong upgrade from Home
-
Pro 8 if you like the 8 × 8 square face that lines up well with sim screens
-
Pro 9 if you want more width for dispersion and two-player use
-
Pro 10 or Pro XL if you have a big, dedicated room and want a truly commanding bay
If you’re still stuck between, say, Home vs Pro or Pro vs Pro 8 vs Pro 9, this is where a dedicated model comparison article is handy. But from a pure space point of view, the table and guidelines above will already narrow your list down to one or two realistic candidates.
Example Room Layouts And Setup Scenarios
Let’s put all this into a few real-world examples. This is often where everything suddenly clicks.
Scenario 1: Small Apartment Or Bedroom
-
Room: 10' long × 8-9' wide × 8' high
-
Best fits: Mini or Junior
How you set it up:
-
Place the net on the short wall so you maximise hitting length
-
Use side barriers if the room is narrow and walls are close
-
Use a shorter hitting mat to save floor space
-
Hit:
-
Short irons
-
Wedges
-
Foam balls if others use the room or you’re worried about noise
This gives you a real practice area without taking over the entire room.
Scenario 2: Single-Car Garage Setup
-
Room: 18–20' long × 10-12' wide × 8-9' high
-
Best fits: Home, possibly Pro if width allows
How you set it up:
-
Mount the net near the garage door or front wall
-
Put your hitting mat around 7-10 ft away from the net
-
Park the car outside when practicing; bring it back in when done
-
Use side barriers if you have shelves or windows on the side walls
This is one of the most common Net Return setups: it feels big enough to swing freely, and you can still use the garage in everyday life.
Scenario 3: Dedicated Sim Room
-
Room: 15-20' long × 12-15' wide × 9-10' high
-
Best fits: Pro 8, Pro 9, Pro 10, or Pro XL
How you set it up:
-
Net or screen at the far wall
-
10–12 ft from ball to screen/net for accurate sim readings
-
Launch monitor either:
-
Behind the ball (radar)
-
Beside or in front (camera-based)
-
Side barriers and/or wall padding for extra protection
-
Turf covering most of the floor in the hitting area
This is where your Net Return setup becomes a full-blown indoor golf simulator room, not just a hitting corner.
Scenario 4: Kids’ Playroom Or Shared Family Space
-
Room: medium-sized bedroom, playroom, or den
-
Best fits: Junior, Mini, or Home
How you set it up:
-
Net on the wall with the fewest breakables
-
Side barriers mandatory if toys and furniture are close
-
Use foam or soft practice balls when other kids are around
-
Make it clear the net is a golf only when supervised area
This lets your kids build a golf habit in a safe, controlled way without you dedicating an entire room to the sport.
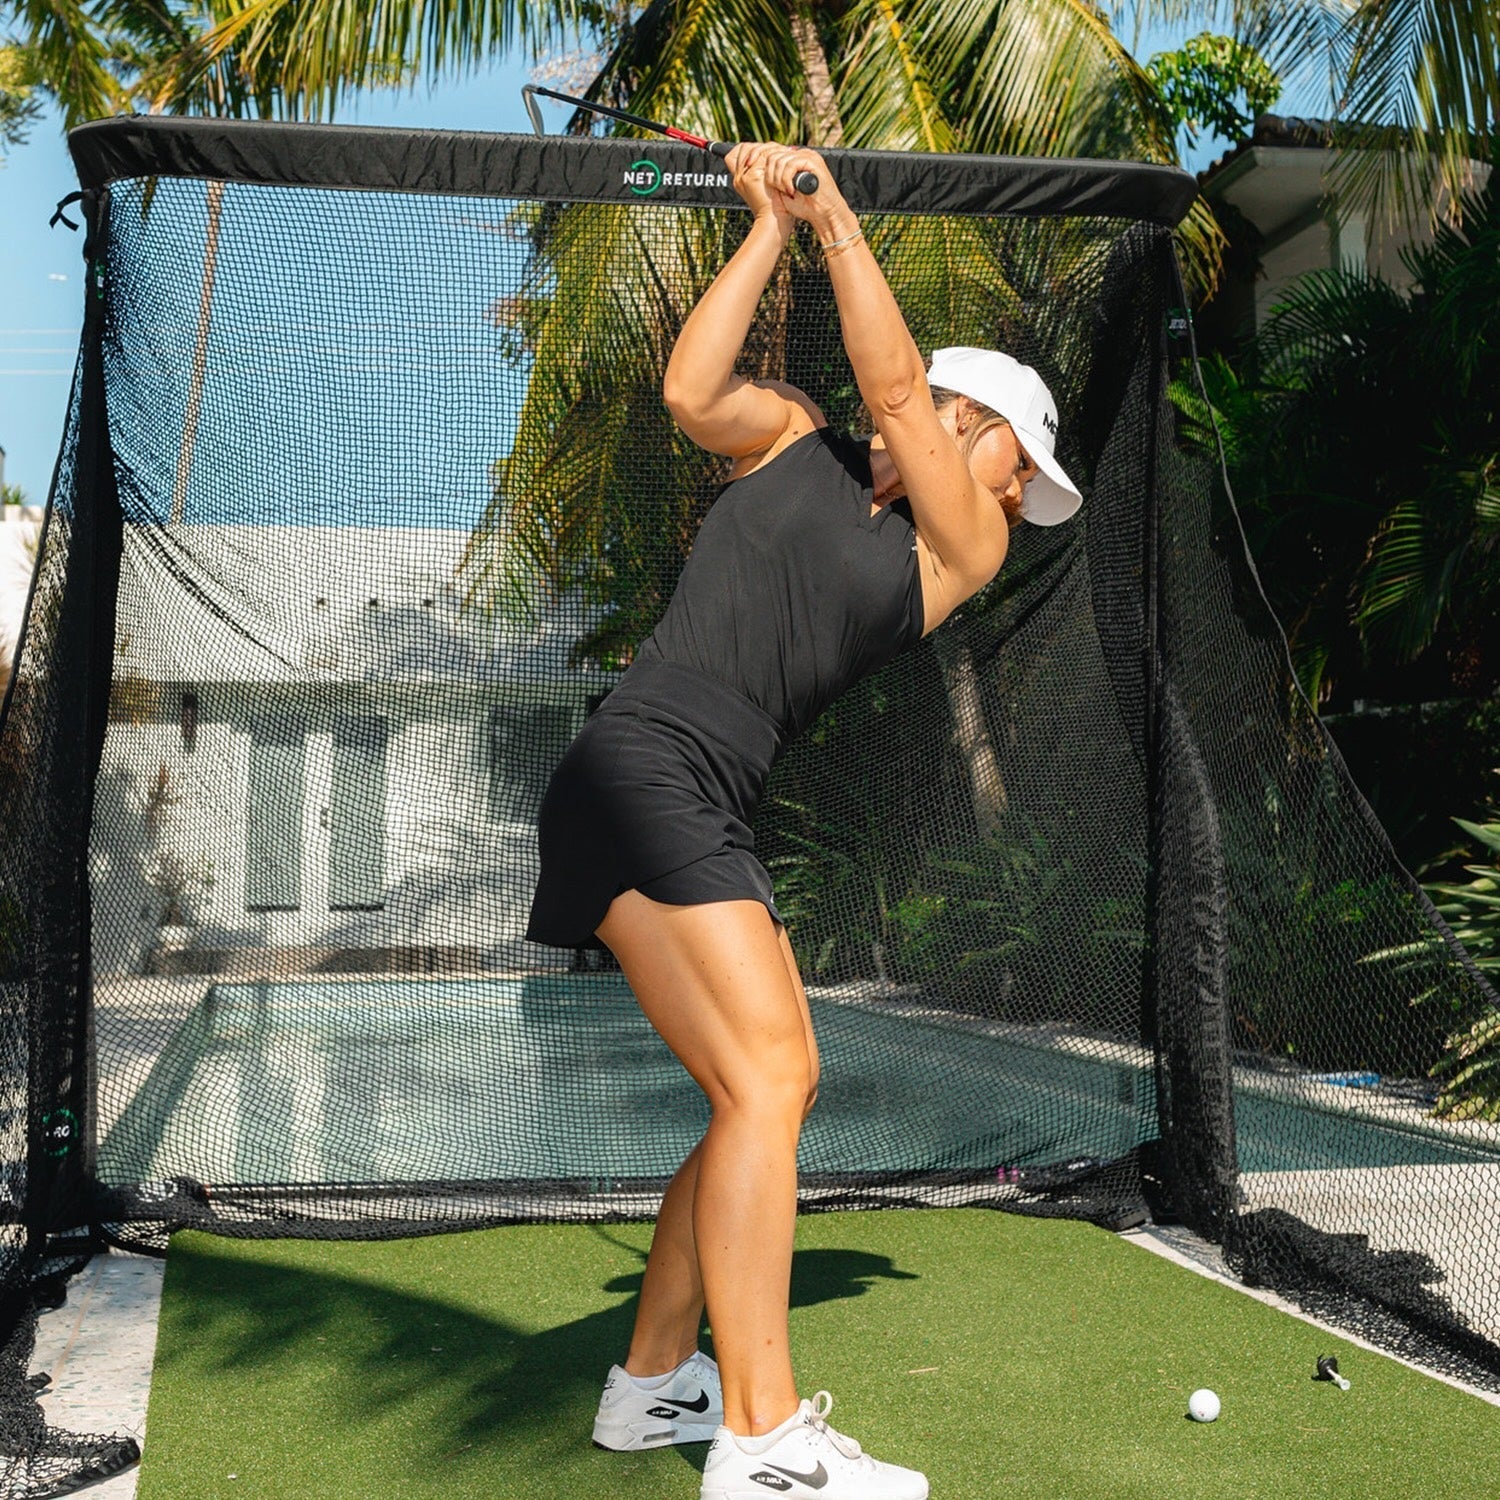
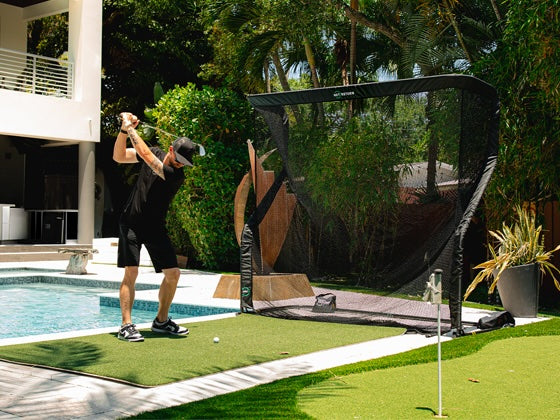
Scenario 5: Backyard Setup
-
Space: patio, lawn, or paved area
-
Any model can work, depending on your space and ambition
How you set it up:
-
Net near a fence or wall, but with a small buffer so the ball never hits it directly
-
Turf or mat under your feet so you’re not chewing up your lawn
-
Side barriers if there are windows, neighbours, or paths nearby
-
Consider:
-
Anchoring in windy areas
-
Storing the net undercover if your weather is harsh
The backyard is where you can truly go as big as your budget and garden allow - but it’s still worth thinking about where balls might go in the worst-case mishit.
Making Your Setup Simulator Ready
You might not start with a full simulator, but it’s worth knowing what it would take to get there.
If you ever want to go from ‘net only’ to:
-
Launch monitor
-
Impact screen
-
Projector and software
You’ll need to think about:
-
Ball-to-screen distance - often in the 7-10 ft range
-
Screen-to-wall distance - enough for the screen to absorb the ball
-
Monitor placement - behind, beside, or in front of the ball depending on the device
-
Ceiling height - realistically, 9-10 ft is the sweet spot for full sim builds
The good news is that:
-
If your Net Return room dimensions are already healthy enough for a Pro Series net and full swings, you’re most of the way there
-
You can upgrade gradually:
-
Start with net + turf
-
Add a basic launch monitor
-
Add a screen and projector later
Planning for this future now (even if you don’t buy everything yet) protects you from having to redo the entire setup down the line.
Ongoing Maintenance, Noise And Neighbor Friendly Tips
Once your Net Return setup is in place, a few small habits will keep it safe, quiet, and pleasant to live with.
Maintenance
-
Check the net regularly for any wear in the high-impact zone
-
Rotate or shift your hitting mat so you’re not always hitting from the same exact spot
-
If you use the net outdoors:
-
Take it down or move it under shelter in extreme weather
-
Make sure the frame feet are stable and not sinking unevenly into soft ground
Noise Control
Indoor hitting can get loud, especially in apartments or upstairs rooms.
To keep things friendlier:
-
Use a thicker turf layer or foam underlay under your mat
-
Put rubber pads or small gym mats under the net’s feet
-
Avoid placing the setup directly over someone’s bedroom if you’re in a multi-storey home
Even a couple of small tweaks here can change the feel from “garage echo chamber” to “comfortable hitting bay”.
Quick Safety Checks Before Each Session
Before you start any practice session, run through this 10-second mental checklist:
-
Are the side barriers extended and anchored properly?
-
Are there any new objects (chairs, toys, boxes) that have drifted into your swing zone?
-
Is anyone likely to walk into the hitting line (kids, pets, partner)?
-
Is your mat stable and not slipping?
If the answers feel clean, you’re good to go.
Quick Recap And Next Steps
You don’t need to be an engineer to build a good Net Return setup. You just need to be honest about your space and clear about what you want your practice to look like.
Here’s the short version:
-
Measure first, buy second.
Length, width, height - all three matter for a safe, enjoyable setup. -
Use the spec tables as your filter.
Match your room to the minimum room dimensions table and you’ll immediately see which models realistically fit. -
Respect ceiling height.
The net standing in the room doesn’t automatically mean your driver swing will feel safe. Your swing arc is the real boss here. -
Take safety seriously indoors.
Side barriers, overhead protection where needed, clear swing space, and no fragile items in the impact corridor. -
Build in stages if you want.
Start with a Home Series net in a garage, or a Mini in an apartment, and upgrade to a Pro Series or full simulator later when space and budget allow.
If you’re still deciding between models - like Home vs Pro, or Pro 8 vs Pro 9 vs Pro 10 vs Pro XL - the next natural step is a dedicated model comparison that focuses on who each frame is really built for.
But from a pure Net Return room dimensions, setup guide, and ceiling height point of view, you now have everything you need to look at your room and say:
Yes, this will work - and I know exactly how to set it up.